Important note Retirement of icTime and Retirement of biz on December 29th, 2023
Log Work
You can log work as you are used from JIRA. ictime enhances the existing log work screen and adds some convenience features for logging work faster and more efficiently, like
- resuming an existing work log
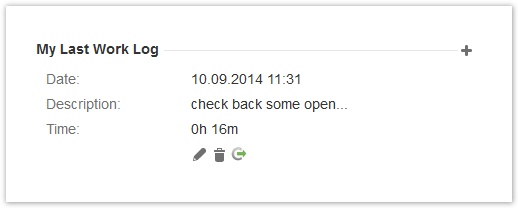
- accessing the last work log from the "My Last Work Log" panel on the issue screen
- accessing your last work logs from the "Recent Work Log" list in the ictime navigation.
This chapter describes how to create, edit, resume and delete work logs. Please also refer to Manage Work Logs.
You can also create, edit, resume and delete work logs directly from your timesheet without having to navigate to an issue in JIRA (see Timesheet), or you can create new work logs directly from the JIRA navigation bar.
Where You Can Log Work
ictime adds the option to log work in a couple of new places, and in addition you'll find the "Log Work" options in all places where you are alreayd used to from JIRA.
- JIRA Navigation Bar
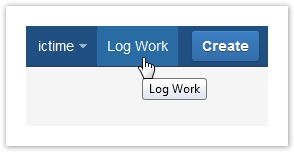
If you have the respective permission, you can user the "Log Work" item in the JIRA navigation bar, next to the "ictime" navigation element (note that in case of very low screen resolutions, JIRA will move the option into a "More" dropdown). - Timesheet
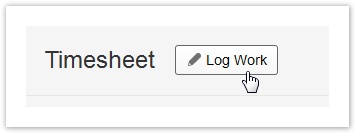
If you have access to timesheets, you can log work with the respective button on the timesheet. - Issue Screen: More Actions/Log Work
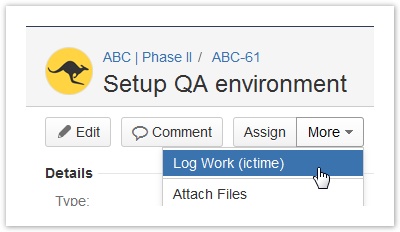
This is the standard way of logging work from the issue screen. - Issue Screen: JIRA "Time Tracking" panel
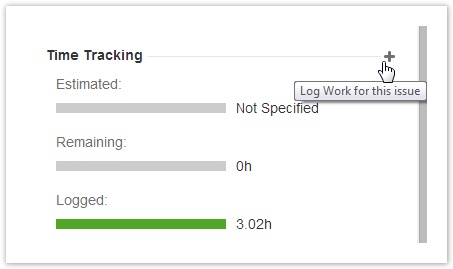
If you have already logged work on an issue (or have defined an estimate of work required for the issue), the JIRA "Time Tracking" panel will be available on the screen and you can also log work here using the "+" icon. - Issue Screen: "My Last Work Log" panel
This panel is added by ictime and is always present, even if you did not log work yet and have no work estimate. You can log work using the "+" icon. - JIRA Issue Navigator (Actions/Log Work dropdown)
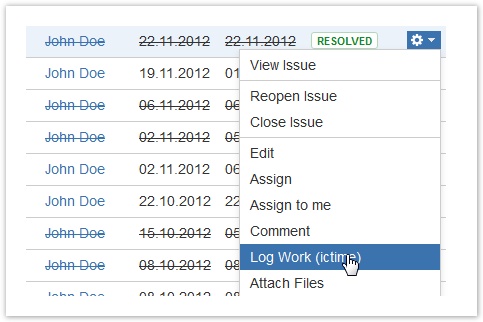
The "Actions" dropdown in the JIRA Issue Navigator also offers the possibility to log work.
There might be other places, like e.g. Dashboard gadgets that display issues and also provide an issue operations (actions) dropdown.
As it is not possible that ictime overrides existing JIRA "log work" actions, ictime has to add own actions. This means that in some places, you will see two "Log Work" options after installation of ictime. There is some configuration work required to solve this issue, please refer here for more details: Hide/Disable JIRA's "Log Work" Dialogue and "Edit Work Log" Option.
Please note that ictime automatically redirects the option to log work from the JIRA "Time Tracking" panel to the ictime screen (this is the only place where this can be done automatically).
Apart from the places mentioned above (where you can open the "Log Work" dialogue), the log work option might also appear as part of other screens during workflow transitions. By default, this is the case e.g. for the "Resolve Issue" screen. See Custom Field Log Work for ictime for more information.
Log Work (ictime) Screen
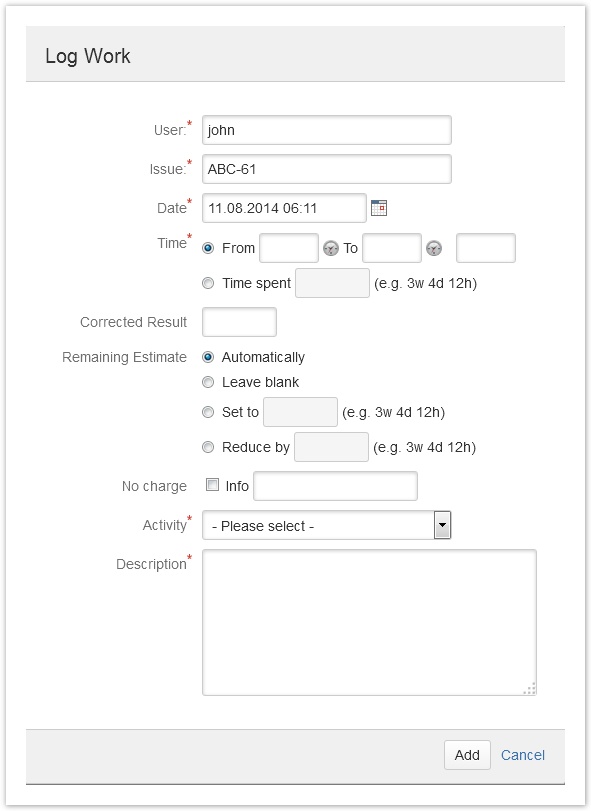
If you enable all ictime features, the "Log Work" screen will look like this:
From ictime version 4.2 on, this dialogue will also offer the option to tick a checkbox to directly create another work log.
In this case, the dialogue won't close after saving and you can add the next work log.
Which options/fields are available in your specific case depend on
- your ictime configuration (see table below and General Configuration)
- your project configuration, specifically as regards teams & price lists and activity types (see table below and Project Configuration)
- your Work Log Attribute (WLA) configuration (see Work Log Attributes (WLA), available since ictime version 4.2)
The following table describes all fields, including the ones that you already know from the JIRA default "Log Work" screen:
| Field | Description | Configurable | Remarks |
|---|---|---|---|
| User | Current user or user picker (if you respective permissions). | If you have the ictime permission "Log work for others" (see ictime Permissions), you can pick/change the user here and this way, can create work logs for other users. | |
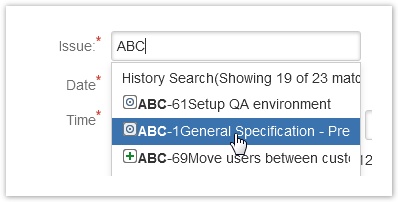
| Issue | Issue picker. If you are calling the "Log Work" screen from an issue (JIRA issue screen or JIRA Issue Navigator), the issue will be pre-populated. If you call the "Log Work" screen from the JIRA navigation, your timesheet etc., you will be required to select an issue first. To select/change an issue, start to type part of the issue description or key in the "Issue" field. The JIRA issue picker will return suggestions: | Please note that the issue is required for others options to work properly. The issue determines the project and this way determines teams & price lists (if applicable) and activity types (if applicable). | |
| Date | Date, shows today's date (and current time) for new work logs. | You can change the date into the past or future, too. The field expects date & time (as this is the default in JIRA, JIRA writes a complete timestamp for the creation date/time into all work logs). ictime provides separate fields for start and end time of a work log, so usually, the time component of this field is not used by ictime and ictime only uses the date component. However, there might be use cases where (e.g. another plugin) is using this data from the JIRA work log If using the calendar, the date you have chosen will be inserted and as time, system will take the current time. To define a different time, you can manually edit the field. In this case, make sure that you enter date & time exactly like it has been defined in your JIRA date & time settings (see Time & Date Settings), otherwise you will get an error when saving. | |
| Time | Log work/time as a time span/period "from-to" (start-end time). Use the icon to enter your current system time for "from" and "to". | Available yes/no, see General Configuration. Force time tracking without overlapping work logs, see General Configuration. | You log e.g. from 12:34 to 14:56, and ictime calculates the resulting time spent for you (displayed as read-only field behind the time fields). The resulting time spent of from/to has to be > 0 as JIRA does not allow saving work logs with a resulting time spent of 0. If you use the clock icons to insert the current time in from/to, they will automatically create an offset of 1 minute so that your entry won't be 0. If you (only) use this way to log work, you can force users to log work without having overlapping start/end times (see General Configuration). Depending on your configurationen, users will just get a warning or won't be able to log work if start and/or end time of one work log overlaps with the start/end time of an existing work log of the same user. Possible time format is taken from your individual JIRA time and date configuration (see Time & Date Settings); that means that we support all time & date formats you can define in JIRA. However, the defined format is the only format you can use to enter time/date (we can't support multiple different formats at a time). |
| Time Spent | Log work/time as a result. This is the default way you log work in JIRA. | Available yes/no, see General Configuration. | e.g. as 12 or 12h, according to your JIRA time tracking configuration. You can find this configuration in JIRA under: Administration - System - Issue Features - Time Tracking (time estimates & default unit for time tracking) |
| Corrected Time Spent (Corrected Result) | You can enter a time value that is different from the "time spent" value or the calculated time spent of logging work with a start and end time. | Available yes/no, see General Configuration. | Used to charge more or less time than the time that had been spent. In the summary of a report, the corrected time spent will be taken instead of "time spent" or the calculated time spent of logging work with a start and end time (see Reports: Summary & Analysis). Rounding rules (see Project Rounding Rule) are ignored in this case, the time value is taken exactly like entered by the user. |
| Remaining Estimate | Various (JIRA) options to set or calculate the remaining estimate, if a work estimate has been done for the issue. | Available yes/no, see General Configuration. If "no", ictime will always calculate the remaining estimate automatically. If there is no original estimate, nothing will be done. | |
| No Charge | Mark a work log as not to be charged and enter an optional comment/reason. | Available yes/no, see General Configuration. | In the summary of a report, the work log would be considered in the "No Charge" section of the report (see Reports: Summary & Analysis). An administrative user can change this setting when editing work logs, e.g. during the process of charing work logs in the Reporting section. See Reports: Work Log Details. |
| Activity | Choose an activity type to categorise your work. If activity types are activated in ictime (see Activity Types), this interface will offer the activity type dropdown. This dropdown will be empty as long as you did not select an issue, as the activity types available for this issue might depend on your project configuration in ictime (see Project Activity Types). | Available yes /no, see Activity Types and Project Activity Types | This is only available and mandatory if you have not globally deactivated activity types (see Activity Types) or have deactivated activity types for the current project (see Project Activity Types). If your current project has exactly one activity type configured, the dropdown will be pre-populated with this activity type. |
| Work Description | Description of your work. | Mandatory. |
It is up to you whether you log work as a result ("time spent") or a time span ("from-to"). You can use both methods for the same issue and can also change this for a work log when editing or resuming a work log. If you switch from "span/period" to "Time Spent" and save, of course you will loose start and end time for this work log. If you switch from "Time Spent" to "span/period", of course you will need to set a suitable start and end time.
Logging work as time span has the following advantages:
- If it is about being exact, and about strictly avoiding that people start to make notes on time spent on paper or in files and register the (rough) result later on in JIRA, the proper way is to register time "from" and "to".
- This also includes the option to register exactly, but to apply a rounding rule for invoicing purposes (you won't charge 6 minutes for support, but probably 15 or 30 minutes as minimum - but it is still nice that you can see that only 6 minutes had been required to solve the issue).
- Finally logging work as time span gives you the oportunity to force time tracking without overlapping work logs (see General Configuration).
Resume a Work Log
Resuming a work log means to create a new work log with data of an existing one, but pre-populating date field and time fields (if applicable) according to the current date and time. This is basically like "copying" some data of an existing work log.
This feature is useful if you e.g. are making a break and after your break, resume your work. This is why we call it "resume" and not simply "copy". You save time as data is already pre-populated. Do not get confused with the opreation of editing an existing work log, resuming really creates a new work log.
On issue level, the feature is available either
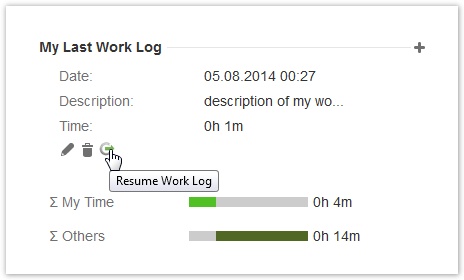
- in the "My Last Work Log" panel
- or in the "Work Log (ictime)" tab.
Click the icon
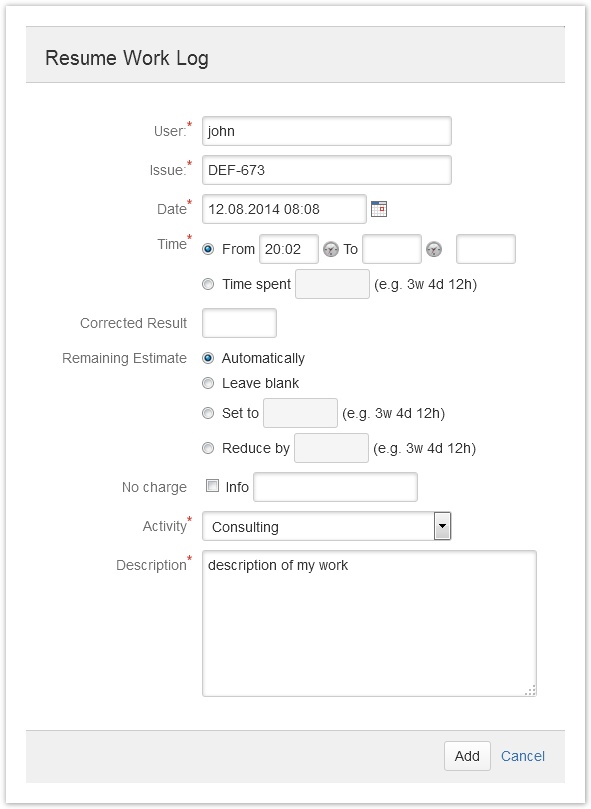
to resume the respective work log. The interface is the same like for creating a new work log from the scratch (see above). Date and time fields are pre-populated according to the current date (and time, if you have logged work as time span). You can modify all fields.
If you can resume a work log (= create a new work log) depends on
- the ictime project status (you can't create new work logs any longer if the project status is "inactive" or "closed")
- and the JIRA issue status (you can't create new work logs for closed issues).
Work Log Attributes (Work Log Attributes (WLA)) are currently not properly supported when resuming work logs.
Manage Work Logs (Edit & Delete)
Once you have created a work log, there are a couple of places where you can access/view your work log and can edit or delete it. Please refer to Manage Work Logs.
Known Issue: Time Not Calculated When Using Start/End Time
If you are entering a start and end time for a work log ("from/to") and the resulting time spent is not calculated, this can have two reasons.
First possible reason is that - like in the screenshot above - you have (accidentally) entered an end time which is before the start time. In this case, of course there is no result. You will get an error when trying to save.
The second, more complex reason - that might result in the same error message, but without getting obvious why the message is displayed - is that you have a specific non-consistent date & time setting configured in JIRA. This will happen if you have configured time settings in JIRA (Administration/System/Look and Feel/Date-Time Formats) as 12 hour clock, but without defining the AM/PM parameter.
- That means that you have defined "Time Format" as "hh:mm" or "h:mm". This is 12 hour clock without AM/Pm information and unfortunately, JIRA accepts this time format, even if it can't work. In this specific case, ictime won't be able to calculate correctly only for the case your work log starts before 12:00 and ends after 12:00 (the end time, without AM/PM information is correctly interpreted as starting from 0 again, so 12:03 would be 00:03 from a technical point of view, and this means that your end time is before the start time).
- Correct setting in JIRA would be "h:mm a" or "hh:mm a" (this is 12 hour clock plus AM/PM information) or just as 24 hour format (H:mm or HH:mm).
For more information on date & time settings in JIRA, please refer to Time & Date Settings.
